Direct answer
Treat takeoff, hover, and landing as one short drill.
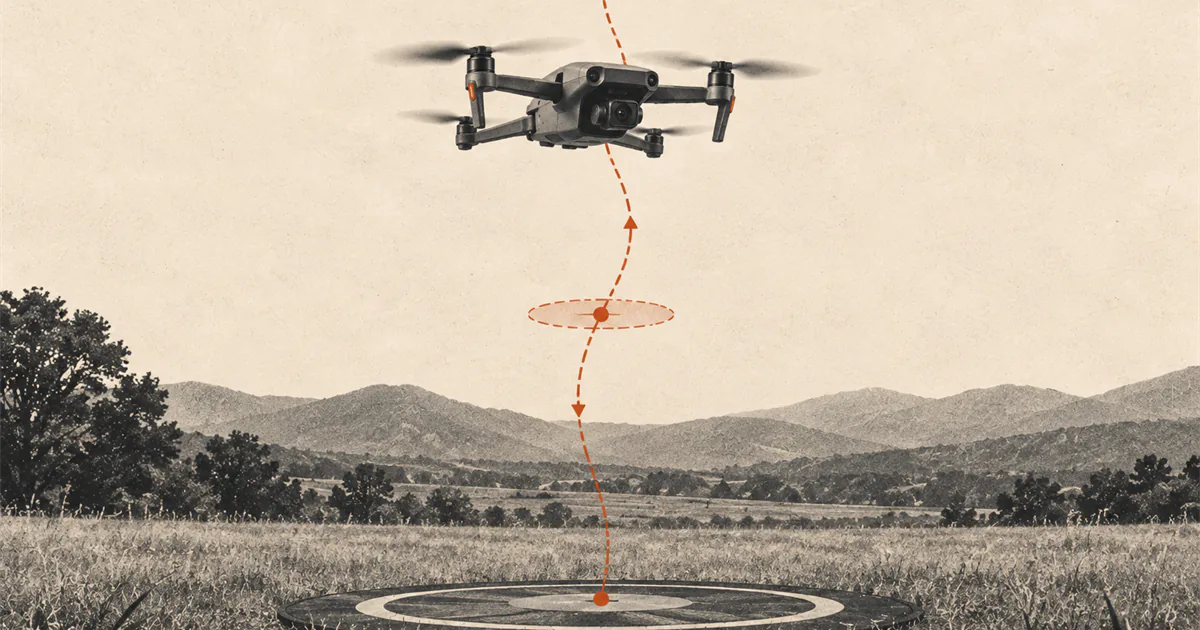
Set the aircraft on a clear stable surface, face its nose in a known direction, and start it only with the model-specific procedure. Rise smoothly into a low, clearly visible hover suitable for the aircraft and site, pause to check response and warnings, then return over the landing point and descend deliberately. Land while the area, battery, link, and orientation are still comfortable, and keep clear until the motors and propellers have fully stopped.
Manual or automatic takeoff?
Consumer drones do not share one motor-start command, takeoff mode, landing system, or motor-stop behavior. Read the current manual for the aircraft, controller, app, battery, and installed accessories before practicing.
Manual takeoff uses the documented motor-start procedure followed by a controlled climb input. Automatic takeoff uses an app or controller command that performs the initial climb. Both require a completed preflight check and a clear launch area.
The DJI Mini 4 Pro v1.4 manual, for example, describes starting the motors and slowly raising the throttle for manual takeoff. Its auto-takeoff option uses a confirmation in DJI Fly and rises to about 1.2 m (3.9 ft). That is this model’s automatic behavior, not a recommended hover height for every drone or practice site. Check the active control mode and learn the cancellation and landing procedure before using automation.
This guide therefore describes the decisions around the maneuver. Whenever it says start, take off, land, or stop the motors, use the exact procedure in your manual.
Set up before the motors start
Complete the drone preflight checklist and use a safe practice area with a clear launch point and alternate landing option.
Place the aircraft on the surface specified by the manufacturer. Remove required transport covers, secure the battery and payload, and keep the propeller area clear. Point the nose in a direction you can identify easily. For the first drill, nose-away orientation reduces the visual reversal between the aircraft and pilot.
Stand where you can see the aircraft and surrounding area without stepping backward, crossing the flight path, or staring continuously at the display. Decide which warning, person entering the area, weather change, or control problem will end the exercise.
Make the takeoff deliberate
Start the motors according to the manual and pause long enough to notice abnormal sound, vibration, warning, or movement. Do not reach toward a powered aircraft or continue because the propellers appear to spin normally when the app or controller reports an unresolved problem.
Apply the model-specific takeoff command smoothly. Move only as far as needed to leave the surface and establish a clearly visible hover appropriate for the aircraft and surroundings. There is no universal beginner takeoff height. A number copied from another guide may conflict with the site, aircraft, local limit, or manual.
Avoid adding pitch, roll, yaw, camera movement, or distance during the initial climb. The first objective is to establish whether altitude, position, heading, link, and aircraft response are predictable. If those inputs are unfamiliar, use the drone controls guide and diagrams before starting the drill.
Pause for a hover check
Once airborne, center the controls if the aircraft is designed to hold position and observe it before starting another maneuver. Confirm:
- altitude and heading are not changing unexpectedly;
- drift remains small and understandable for the conditions and model;
- controller and video links behave as expected;
- no new propulsion, battery, positioning, wind, sensor, or compatibility warning appears;
- the landing point and alternate remain clear;
- the aircraft’s nose is still easy to identify.
If the drone needs progressively larger corrections, moves unpredictably, or reports a warning you cannot resolve in flight, end the drill with the model-specific safe landing procedure. The separate hover guide explains how to practice small corrections without turning this sequence into a longer flight.
Return over the landing point
Begin the landing while battery, visibility, link quality, and attention still have comfortable margin. Move back over the chosen point using small inputs and pause in a stable hover before descending. Do not combine a fast approach, yaw turn, and descent near the ground.
Check the surface again. People, animals, loose material, shadows, moving vehicles, or a shifted landing marker can make the original point unsuitable. If the manual and remaining margin allow, hold or reposition to the alternate rather than forcing the aircraft into a compromised area.
Descend using the exact control or automatic landing process for the model. Keep the path clear and expect the aircraft’s sensors or landing protection to have documented limits. Automation does not make an unsuitable surface suitable.
After touchdown, stop the motors as instructed. Keep hands, clothing, straps, and other people away until every propeller has fully stopped. Then power down in the manufacturer’s order and inspect the aircraft before moving it.
Repeat one controlled drill
Use a short sequence instead of extending the flight after a good landing:
- Set the aircraft nose-away on the clear landing point.
- Start the motors with the model-specific command.
- Take off smoothly into a clearly visible hover.
- Pause and check position, heading, link, warnings, and landing area.
- Make only the corrections needed to remain predictable.
- Return over the marker and stabilize before descending.
- Land deliberately and stop the motors according to the manual.
- Review one thing to keep or change before repeating.
Stop after a clean repetition rather than adding an unplanned maneuver. The broader first-flight guide adds short movements only after this basic sequence feels controlled.
Land instead of continuing when
- orientation or the landing point becomes unclear;
- the aircraft cannot hold a predictable position with small corrections;
- a battery, wind, positioning, propulsion, sensor, or link warning appears;
- a person, animal, vehicle, or other hazard enters the area;
- the planned landing surface becomes unsuitable;
- wind, visibility, or precipitation changes;
- you become rushed, distracted, or tempted to use the remaining battery for one more maneuver.
A brief takeoff and landing can be the complete session. The goal is a repeatable controlled sequence, not airtime.
Drone takeoff and landing FAQ
How do I land a drone manually?
Return over a clear, suitable landing point, pause to stabilize, then use the documented descent input. On a Mode 2 Mini 4 Pro, the manual describes lowering the left throttle stick to descend and holding it down after touchdown until the motors stop. This is an exact-model example; confirm the procedure for your aircraft. Keep clear of the propellers until they have stopped.
Is automatic landing the same as Return to Home?
No. Automatic landing descends at the current landing location. Return to Home can include a route back to a recorded point before landing. Neither confirms that the surface is clear or suitable. On the Mini 4 Pro, user-commanded auto landing can be canceled through its documented app control; critical-battery forced landing has different limits. Do not assume all automatic descents can be canceled.
What is a good place to take off and land?
Use a clear, stable surface suitable for the aircraft, with room to keep people and loose material away and an alternate landing area identified. A landing pad can help define the point, but it does not clear airspace, property access, wind, or sensor limitations. Check the safe practice area guide.
What should I check after landing?
Once the propellers have stopped, power down in the manufacturer’s order and inspect the aircraft, propellers, and battery before another flight. Record unexpected movement, warnings, damage, or a hard landing and resolve them before reuse. Virginia Tech’s model-specific checklist includes these post-flight inspection and anomaly-recording steps. See the post-flight check on the preflight page for a short reminder.
Sources
Check the underlying guidance.
The manufacturer manual controls the exact start, takeoff, landing, and motor-stop sequence. The training source supports the limited takeoff-hover-land progression, not a universal height or aircraft behavior.
- DJI Mini 4 Pro User Manual, DJI. Manufacturer source. Checked . Used as an exact-model example of manual and automatic takeoff, landing, motor, positioning, and landing-protection behavior.https://terra-1-g.djicdn.com/6189933d30024fc1b331bffe4fe41837/mini-4-pro/UM/DJI_Mini_4_Pro_User_Manual_en.pdf
- sUAS Manual Flight Exercises, Virginia Cooperative Extension, Virginia Tech. Independent source. Checked . Used for the expert-reviewed training progression that combines takeoff, a brief hover, return to the landing zone, and landing.https://www.pubs.ext.vt.edu/content/dam/pubs_ext_vt_edu/CNRE/cnre-149/CNRE-149.pdf
- Recreational Flyers & Community-Based Organizations, Federal Aviation Administration. Government source. Checked . Used for the current recreational visual-line-of-sight, right-of-way, and safe-operation boundaries.https://www.faa.gov/uas/recreational_flyers
Editorial disclosure: This guide adapts manufacturer instructions and an expert-reviewed training framework into a conservative beginner drill. DroneReviewed is not claiming original flight instruction or a universal motor-start procedure.